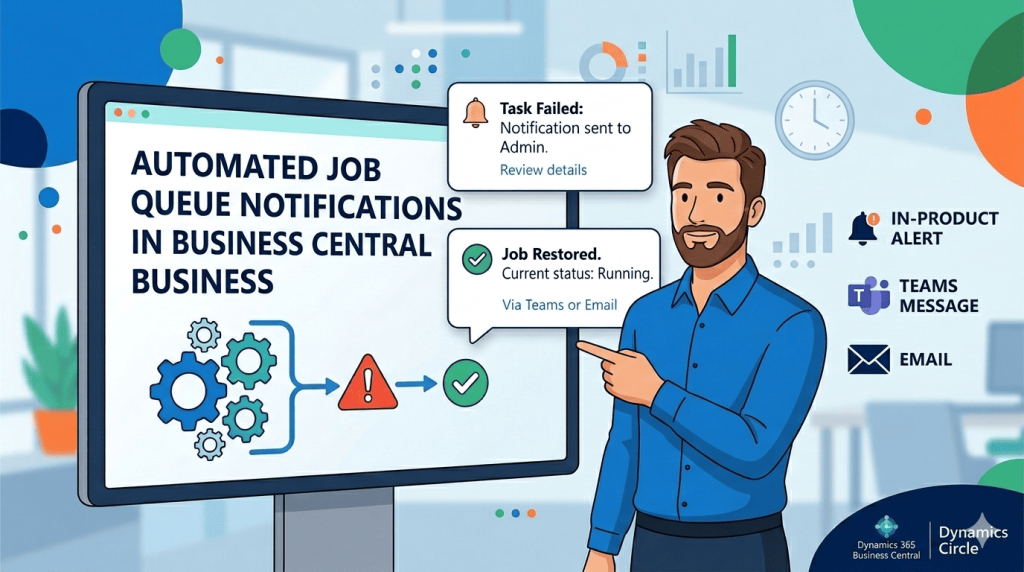
Why Job Queue Notifications Matter
If you use Microsoft Dynamics 365 Business Central to run your business, you're likely relying on Job Queues every single day — even if you don't think about them. Job Queues are the behind-the-scenes engine that handles tasks automatically: posting invoices overnight, syncing data with external systems, generating reports, processing payments, and much more.
The problem? When a job fails silently, you might not find out until the damage is already done. A posting that didn't complete. A report that wasn't generated. An integration that stopped mid-sync. Without a notification, you could be working from outdated or incorrect data without realising it.
That's exactly why Microsoft introduced Job Queue Failure Notifications in the 2024 Release Wave 2. This feature gives you and your team a proactive alert — the moment something goes wrong — so you can fix it before it disrupts your operations.
In this guide, we'll walk you through exactly how to set it up, what your options are, and how to choose the right notification method for your team.
Setting Up Job Queue Notifications
Getting started is straightforward. Business Central guides you through the configuration using its built-in Assisted Setup wizard — a step-by-step process designed to get you up and running quickly without needing technical expertise.
Follow these steps to configure your notifications:
Step 1 — Open Assisted Setup
From your Business Central home page or the search bar, navigate to Assisted Setup. This is your starting point for configuring many guided features in Business Central, including job queue notifications.
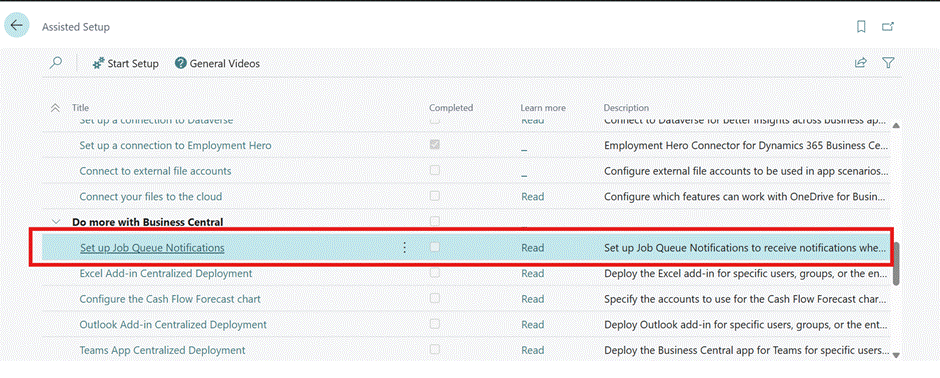
Figure 1: Navigate to Assisted Setup from your Business Central menu
Step 2 — Select "Set Up Job Queue Notifications"
Inside Assisted Setup, look for the option labelled Set Up Job Queue Notifications. Selecting this launches the dedicated configuration wizard for this feature. The wizard walks you through each decision one at a time, making it easy to configure even if you're doing it for the first time.
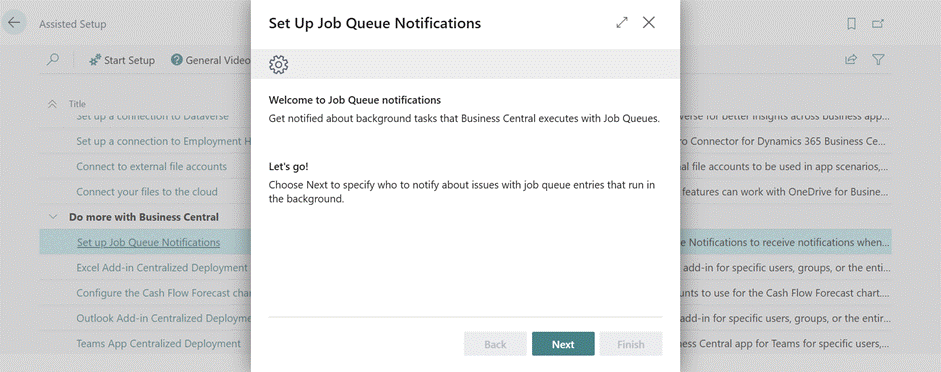
Figure 2: Select the Job Queue Notifications setup option from the Assisted Setup list
Step 3 — Choose Who Gets Notified
One of the most important decisions you'll make is deciding who should receive alerts when a job fails. Business Central gives you two options, and you can select one or both:
- The user who initiated the job: This is the person who originally scheduled or triggered the job queue entry. They're often best placed to understand what the job was doing and how to resolve the failure.
- Job queue administrators: These are team members with responsibility for managing and monitoring background processes. Notifying administrators ensures someone with the right technical access is always in the loop, even if the original user is unavailable.
| 💡 Tip: You can select both options at once, which is recommended for business-critical jobs where fast response is essential. |
Figure 3: Choose whether to notify the job initiator, administrators, or both
Step 4 — Choose Your Notification Method
Next, you'll decide how those notifications are delivered. Business Central offers two distinct approaches, each suited to different working styles:
- In-product notifications: Alerts appear directly inside Business Central when users log in. Ideal for teams who are regularly working within the system and want to see issues alongside their other tasks.
- External notifications via Business Events or Power Automate: Alerts are sent outside Business Central — for example, by email or Microsoft Teams message. This is essential for managers, administrators, or anyone who might not be actively logged into the system when a failure occurs.
You can enable both methods simultaneously, giving your team maximum coverage regardless of where they're working at any given moment.
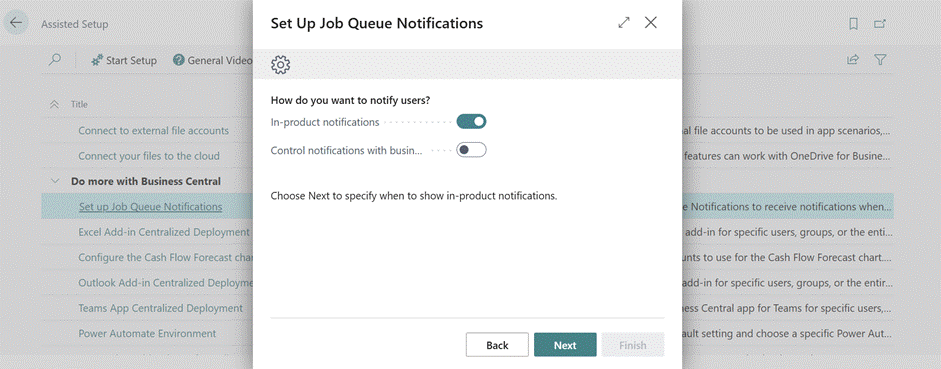
Figure 4: Select your preferred notification delivery method — in-product, external, or both
Step 5 — Set Notification Frequency
The final configuration step is deciding how often you want to be notified. This is where you can fine-tune the sensitivity of your alerts to match the needs of your business:
- Immediate notification: An alert is sent as soon as a job fails. This is the best choice for time-sensitive processes where any delay could have a knock-on effect — for example, payment runs, stock updates, or customer-facing integrations.
- Threshold-based notification: Alerts are only triggered when failures exceed a defined limit. This helps reduce noise in environments where occasional, low-priority job failures are expected and can be resolved during normal working hours without urgency.
| 💡 Tip: For critical financial or integration jobs, we strongly recommend setting notifications to Immediate. For lower-priority batch jobs, threshold-based alerts can reduce interruptions while still keeping you informed. |
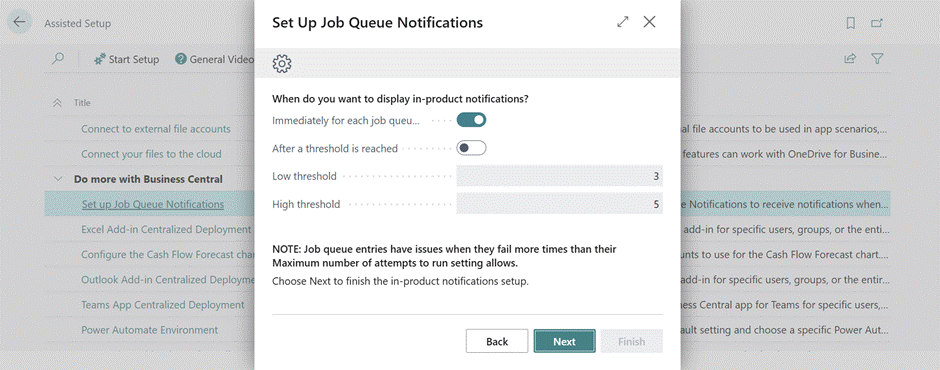
Figure 5: Configure whether to be notified immediately or only after a threshold is reached
Once you've completed all five steps, your Job Queue Notification setup is active. The confirmation screen below shows a summary of your configuration.
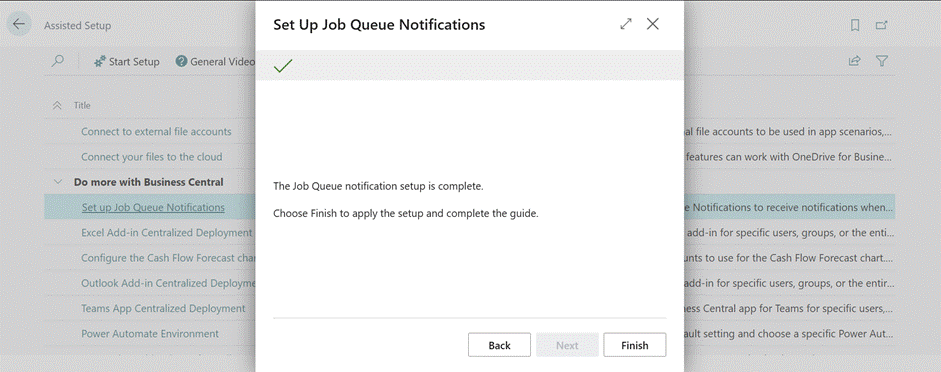
Figure 6: Setup complete — your Job Queue Notification preferences are now saved and active
In-Product Notifications: What They Look Like in Practice
If you chose in-product notifications, here's what you and your team will experience when a job queue entry fails.
The Notification Banner
When a user logs into Business Central and there are failed job queue entries waiting for their attention, a notification banner appears at the top of their screen. This is clear, impossible to miss, and appears immediately upon login — so users are aware of any issues right at the start of their working session.

Figure 7: The in-product notification banner alerts users to job queue failures upon login
Drilling Into the Details
Clicking on the notification banner takes users directly to a summary of what failed. From this view, they can:
- Read the error message to understand what went wrong
- See which specific job queue entry failed and when
- Restart the failed job directly from the notification panel — no need to navigate to a separate menu
- Dismiss the notification once the issue has been reviewed or resolved
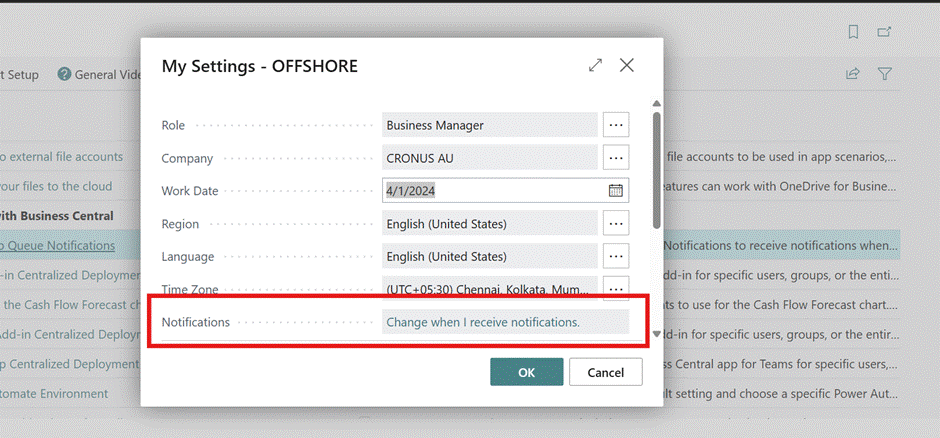
Figure 8: Clicking the notification reveals full error details and gives users the option to restart the failed job
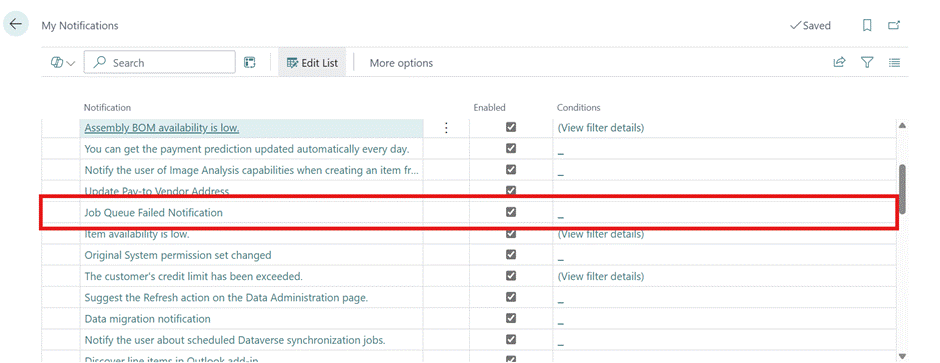
Figure 9: The job queue error detail view, showing the exact failure reason and available actions
Role Centre Cues: A Live Dashboard for Job Queue Health
Beyond individual notifications, Business Central also adds visual cue tiles to your Role Centre — the dashboard that users see when they first open the system. These cues give anyone an at-a-glance view of the current state of all background tasks, without needing to open any menus:
- Tasks Failed: Shows the number of job queue entries that have encountered errors and need attention.
- Tasks In Process: Shows jobs that are currently running, so you know what's actively happening in the background.
- Tasks in Queue: Shows jobs that are scheduled and waiting to run.
These cues are particularly useful for administrators and managers who want a real-time health check without needing to investigate individual job entries.
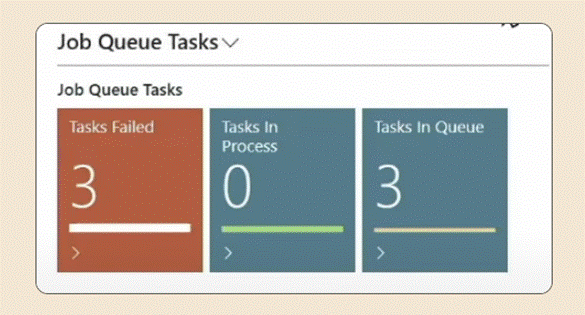
Figure 10: Role Centre cue tiles displaying the current count of failed, in-process, and queued background tasks
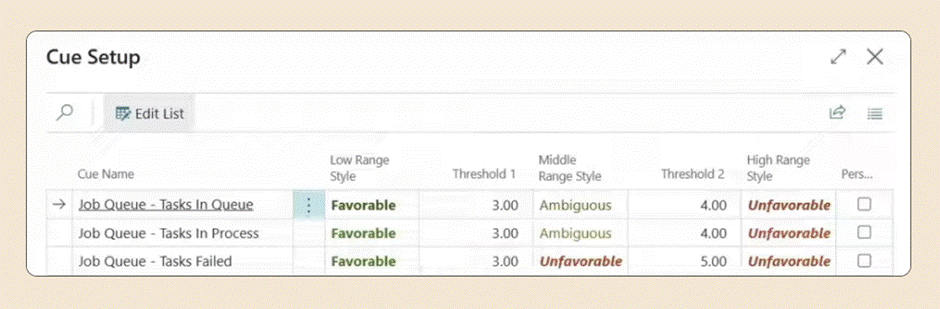
Figure 11: An expanded view of job queue activity visible directly from the Role Centre dashboard
External Notifications via Power Automate
For users who aren't regularly logged into Business Central — or for organisations that want notifications to reach people across multiple channels — Power Automate integration is the answer. This approach connects Business Central's Job Queue events to the wider Microsoft 365 ecosystem, enabling automated alerts via email, Microsoft Teams, and more.
How to Set Up a Power Automate Flow
Microsoft provides pre-built templates to make this process as simple as possible. Here's how to get started:
- Open Power Automate: Go to flow.microsoft.com or access Power Automate from the Microsoft 365 app launcher.
- Search for Business Central templates: In the search bar, type "Business Central Job Queue" to find the relevant pre-built flow templates provided by Microsoft.
- Select and create a flow: Choose the template that matches your notification needs. Microsoft's templates are pre-configured to trigger on job queue failure events, saving you significant setup time.
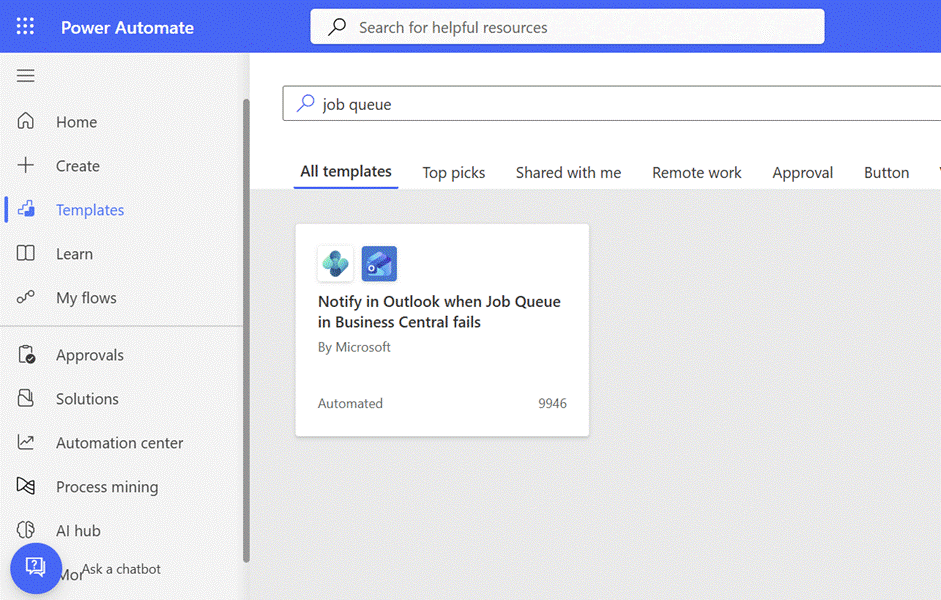
Figure 12: Power Automate template library showing available Business Central Job Queue notification flows
- Connect your Business Central environment: When prompted, sign in and select the Business Central company and environment you want to monitor. This links the flow to the correct data source.
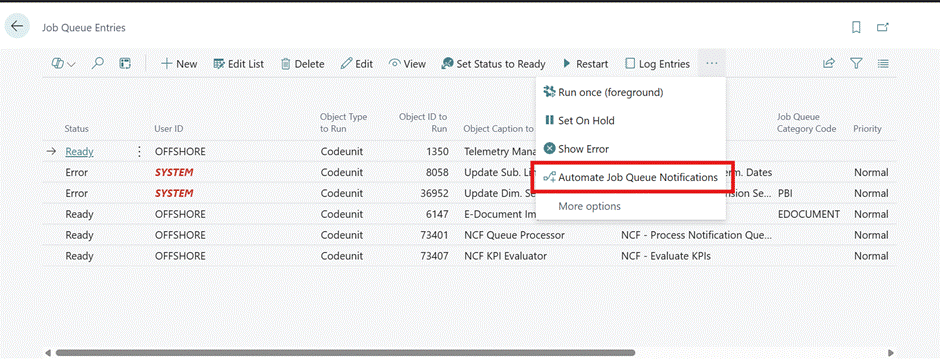
Figure 13: Connecting your Business Central environment to the Power Automate flow
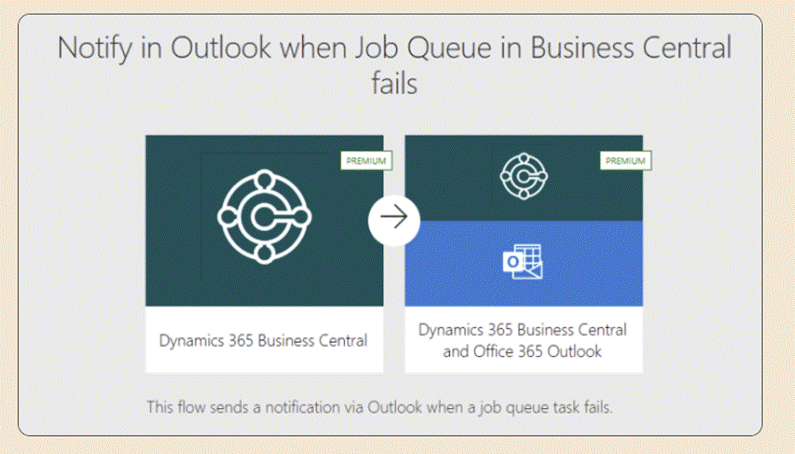
Figure 14: Authenticating the Business Central connection within Power Automate
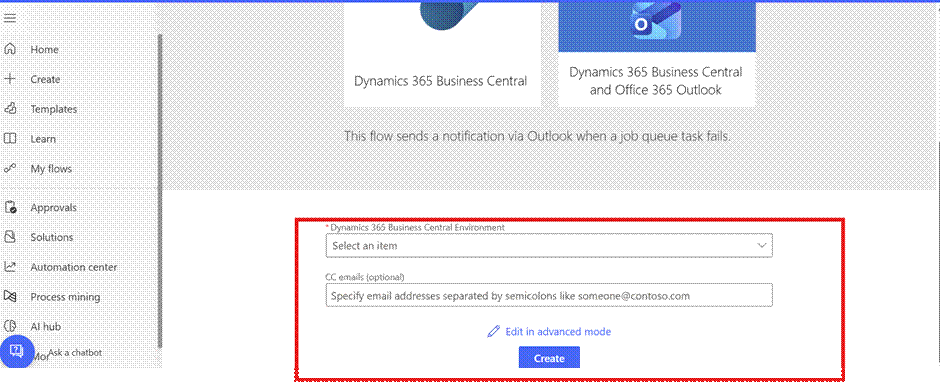
Figure 15: Selecting the specific Business Central company and environment for the notification flow
- Configure your notification action: Choose what happens when a job fails. The most common options are sending an email or posting a message to a Microsoft Teams channel. You can configure the recipient, subject line, and message content at this stage.
Customising Your Notifications
One of the great strengths of the Power Automate approach is flexibility. Once your base flow is set up, you can customise it to suit your team's specific needs:
Custom Email Content
Rather than sending a generic alert, you can personalise the email body to include the job name, the error message, the time of failure, and any other fields from the Business Central job queue record. This gives recipients the context they need to act immediately, without having to log into Business Central first.
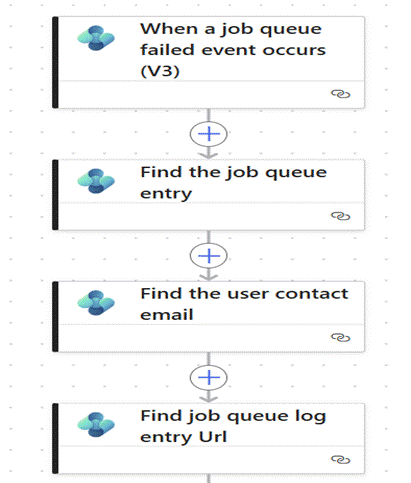
Figure 16: Customising the notification email layout, recipients, and message content in Power Automate
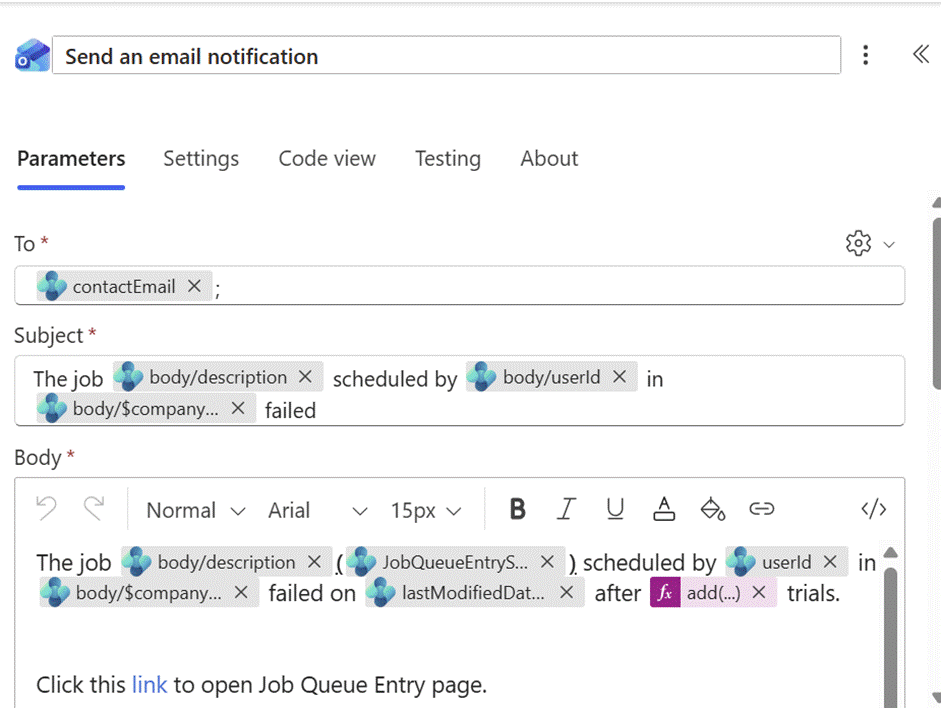
Figure 17: A detailed view of the email action configuration, showing how to include dynamic Business Central fields
Additional Logic and Conditions
You can add conditional steps to your flow — for example, only send an alert if the same job has failed more than twice, or escalate to a manager if no action is taken within a set time window. This makes your notifications smarter and reduces the risk of alert fatigue.
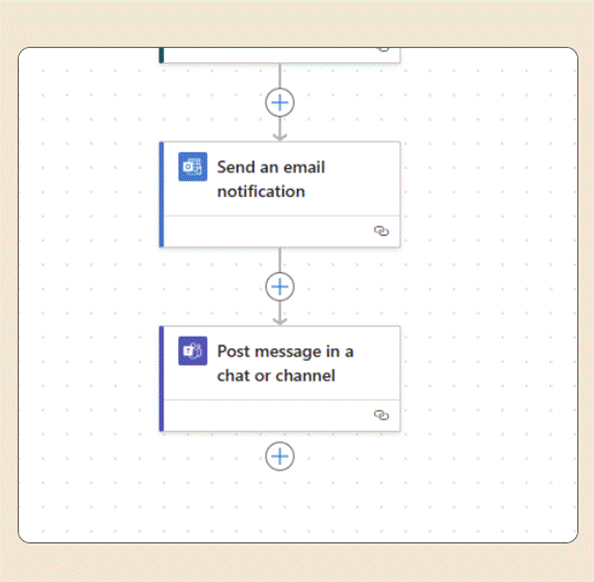
Figure 18: Adding conditional logic to the flow to filter or escalate notifications based on specific criteria
Microsoft Teams Notifications
If your team uses Microsoft Teams as their primary communication platform, you can route job queue failure alerts directly to a Teams channel or as a direct message to specific users. This keeps everything within the collaboration tools your team already uses, removing the need to check a separate email inbox.
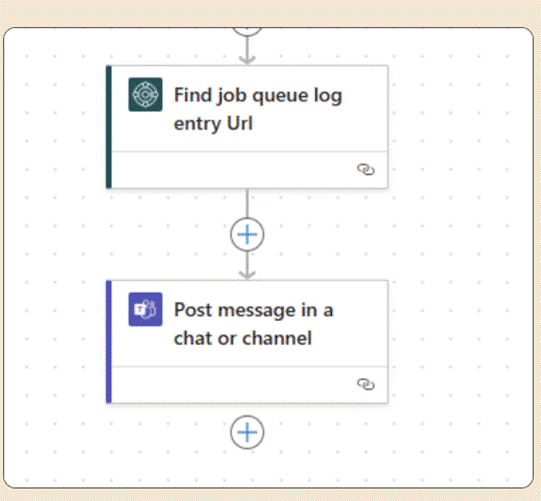
Figure 19: Configuring a Microsoft Teams notification to alert the right channel or user when a job queue entry fails
Using Business Events for Advanced Integrations
For organisations that want even more control over how they respond to job queue failures, Business Central's Business Events framework provides a powerful alternative. Rather than using pre-built templates, you can build a fully custom automated workflow triggered directly by the job queue failure event.
How a Business Events Flow Works
A typical Business Events-based notification flow looks like this:
- Trigger: A Job Queue failure event fires in Business Central. This is the Business Event that starts the flow — no polling or scheduled checks required.
- Retrieve the job record: The flow automatically fetches the full details of the failed job queue entry, including the error message, the job type, the time of failure, and which user initiated it.
- Send a targeted notification: Based on the data retrieved, the flow sends a notification to the appropriate person or system — whether that's an email, a Teams message, a ticket in your helpdesk system, or even a custom webhook to a third-party tool.
This approach is particularly valuable for larger organisations or those with complex IT environments, as it allows Business Central to integrate with virtually any external system that can receive data from Power Automate or Azure Logic Apps.
Notification Options at a Glance
Business Central gives you meaningful control over how notifications behave. Here's a summary of the key choices available to you, and when each one makes the most sense:
Who Receives the Notification?
- The user who initiated the job: Best when the person who set up or triggered the job is also responsible for resolving failures. Keeps accountability with the right individual.
- Job queue administrators: Best for centralising oversight. Ensures that even if the original user is unavailable, someone with the right access and knowledge is notified.
- Both: Recommended for high-priority jobs where speed of response is critical.
How Are They Notified?
- In-product: Simple to set up, no additional tools required. Works best for users who are logged into Business Central regularly.
- Email via Power Automate: Reaches users wherever they are, even when they're away from Business Central. Easy to customise with job-specific details.
- Teams message via Power Automate: Keeps everything within your team's primary collaboration tool. Ideal for IT and support teams who manage Business Central alongside other responsibilities.
When Are They Notified?
- Immediate: Every failure triggers a notification. Best for time-sensitive or business-critical background tasks.
- Threshold-based: Notifications only fire after a defined number of failures. Reduces noise for lower-priority jobs while still ensuring issues don't go unnoticed indefinitely.
The Business Benefits of Getting This Right
Setting up Job Queue Notifications isn't just a technical nice-to-have — it has real, measurable impact on how smoothly your business runs. Here's what organisations typically experience after enabling this feature:
- Faster response to failures: Problems are identified and resolved in minutes rather than hours or days. Your team knows about failures as soon as they happen, not when a customer complains or a deadline is missed.
- Reduced business disruption: Background tasks that fail silently can cause cascading problems — missing stock updates, unposted transactions, broken integrations. Early notification stops small failures from becoming large ones.
- No more manual monitoring: Without notifications, someone has to manually check job queue logs. This is time-consuming and easy to forget. Automated notifications remove this burden entirely.
- Clear accountability: When the right people are notified automatically, there's no ambiguity about who should respond. Issues get picked up and resolved without unnecessary back-and-forth.
- Audit trail and compliance support: Knowing when jobs fail and who was notified supports internal audit processes and can be important for regulated industries that rely on Business Central for financial posting and reporting.
Wrapping Up
Job Queue Notifications in Microsoft Dynamics 365 Business Central are a simple but genuinely important feature. In just a few steps through Assisted Setup, you can ensure that your team is always aware of background task failures — before they have a chance to impact your customers, your data, or your operations.
Whether you opt for in-product alerts for users already working in Business Central, email and Teams notifications for a broader audience, or a custom Business Events integration for a more sophisticated setup, the result is the same: your business stays informed, responsive, and in control.
If you're not sure which approach is right for your organisation, or you'd like help configuring this alongside other Business Central optimisations, our team is happy to help you assess your setup and get the most from the platform.
Comments are closed